Vibe Coding with Cursor AI (Tips and Tricks Included)

You’ve probably heard about vibe coding before. Or maybe you haven’t yet, and you’ll realize, “Oh, so that’s what it’s called now,” once you read a bit further. Vibe coding is all about using AI to write the code (all of it!) while you guide it with prompts. With it, even people with zero coding experience can create working software—though code quality is another story. It focuses on results and workflows rather than the nitty-gritty details of software engineering.
Now, I’m not a software engineer and don’t know any programming languages. But I’m the kind of person who doesn’t let that stop me. I know how to prompt large language models, and I’m good at efficient problem solving. I’ve also created some custom HTMLs for my company’s website using AI (like our AI Developer Tools tier list table). Thanks to these, I should be great at making the AI code something nice for me, right? So, when the vibe coding trend caught my attention, I decided to push my “AI coding” limits.
In this guide, I’ll show you how to vibe code in Cursor AI and Claude 3.7 by using the example of a WordPress plugin that adds a “questionnaire” widget to Elementor. While this plugin addresses a specific use case, the lessons learned go way beyond that (plus, I needed one, so I made it with AI—and I hope you’ll be able to say the same about your coding projects once we’re finished!). Along the way, I’ll share my tips and tricks so you can dive right into vibe coding with confidence.
Key Points
|
First Steps in Vibe Coding with Claude 3.7
I decided to use the web version of Anthropic’s Claude 3.7 Sonnet. Why was it my first choice? It offers a real-time code preview, and Claude 3.7 is the best LLM for coding (or was at the time of writing this – early April 2025; funny how this has to be said because of rapid AI advancements). I also know it well. If you want a web app for vibe coding, this is the way to go. It should easily take you further than the alternatives (GPT 4o or Grok3).
I didn’t prepare any Convention File* at this point. I just went with a simple prompt. Looking back, I should have prepared one to avoid multiple iterations. Here’s the prompt I used:
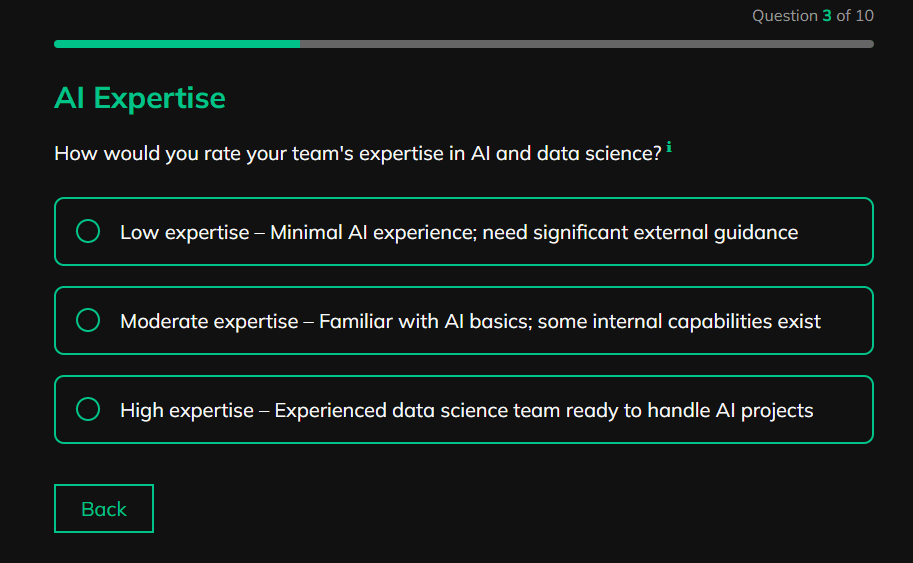
I need a prototype of a configuration app to help my clients determine which of the three AI Agent solutions best fits their needs. The app should feature a clean, user-friendly interface and deliver a smooth user experience. It should guide clients through a series of questions with predefined answer options, then provide a recommendation based on their responses—along with a brief explanation.
I also attached our branding guidelines and details about our AI Agents offer.
Looking back, I should’ve taken safety more seriously—starting right here, at the very beginning. I didn’t realize how risky vibe coding could get until I helped a teammate write a guide on secure AI-assisted coding. That’s when it hit me: just because you don’t fully understand how your vibe code works doesn’t mean you can ignore safety. Technically, sure—you can. But if your app takes off and starts making money, the risks grow fast. One overlooked mistake can cause real damage. I’ve heard stories of vibe-coded apps being hijacked by hackers with ease.
*A document that defines coding standards, tech stack, workflows, and communication preferences to guide AI-generated code
Initial Results
With just one prompt, I got a working prototype. Claude had no problems implementing the features I requested. But there were some issues with user experience and overall value:
- Low number of questions, with a low point spread, often yielded vague results (under 10% difference between solutions).
- The UI needed fewer manual clicks (choosing an answer didn’t move you to the next question automatically).
- Lack of tooltips made some questions hard to understand.
- The end screen took up too much vertical space.
- Users couldn’t easily copy their answers (a Convention File might have reminded me about this sooner).
Iterations, Improvements, and…
I started iterating right away. The prototype improved fast. I increased the number of questions to 10 and increased the point spread to 5. This made the results more decisive.
But then Claude refused to align the tooltip icon properly with the text.
![]()
After a few attempts, the CSS broke. Claude’s fixes didn’t work either.
At that point, I went back a few versions and started fresh. I recommend this to anyone doing vibe coding. Sometimes, rolling back to a previous version and moving forward from there—using the knowledge and experience gained from failed attempts—is the best way to get things working. It might sound trivial, but it doesn’t just save time; it helps you create something that works.
How to roll back: In Cursor AI, you can do this by clicking the “restore checkpoint” button next to one of your previous chat messages. For Claude, you can sometimes start your prompt with “revert to version <number>, and…” to roll back. Or, copy one of your earlier code versions into a new conversation.
That strategy worked. I got the tooltip positioned the right way. Copying answers was also an easy upgrade. All that was left was layout optimization. The app took too much space in its current form.

A Brick Wall
This seemed simple. I just wanted smaller font sizes, tighter margins, and maybe a 90-degree flip for some elements. But the web app struggled. CSS started appearing in the front end (again!), and margins broke.

Moving to Cursor AI
That’s when I decided to go “professional” and switch to an AI-powered code editor. I had tried Cursor for content writing before, and it worked great (seriously, try it). It also had Claude 3.7 built in. If you need alternatives, check out our AI Developer Tools ranking.
Another reason Cursor is great for vibe coding is its Agent mode. It can execute all operations needed to complete your task on its own. It creates folders, files, documentation, and even asks for requirements. You can build apps with one prompt. They might even work if your prompt and Convention File are detailed enough.
Here’s a beginner’s guide to using Cursor AI for software development, by the way. If Cursor isn’t your thing, we’ve also listed over 20 alternatives in our AI Developer Tools list.
Great Success
After pasting the code, letting Cursor index it, and describing my issues, Cursor fixed everything in one go. I can’t promise it will do that every time, but it’s definitely more capable than the web version of Claude 3.7.
I now had a working web app for our AI Agent Development landing page. But it worked only for that page. It also wasn’t easy to edit, and it caused conflicts with our custom CSS. So I had an MVP, but I needed something more universal.
Vibe Coding in Cursor AI
I decided to turn my MVP into a widget for Elementor (the plugin we use to make our pages). This time, I prepared something like a simple Convention File:
Create an Elementor Widget Based on the Configurator – HTML File
The widget should replicate the appearance and functionality of the provided HTML file.
Widget Requirements:
Must include an editor within the Elementor panel (on the left side).
In the editor, users should be able to:
Add more questions, with customizable answers and point values.
Add result types and their definitions.
Enable or disable tooltips (include a toggle control in the editor).
Tech Stack:
PHP: Widget registration, backend logic, Elementor controls, server-side rendering
JavaScript: Frontend interactivity, form handling, dynamic content, animations
CSS: Styling, responsive design, animations
HTML: Markup structure, frontend templating (usually within PHP)
Optional: jQuery (already in WordPress), AJAX, JSON, SCSS/SASS
Full disclaimer: I didn’t know how to create Elementor widgets yet. I used Cursor’s “ask” mode to learn which technologies Elementor widgets rely on. That allowed me to prepare a basic Convention File and move forward with coding.
Cursor’s AI Agent in Action
At first, AI tried to create a full “commercial” plugin that would meet the standards for an official Elementor Addon. I told it I just needed something basic for my site. We settled on a simpler approach:
Once I hit enter, Cursor created new folders and files, then coded the widget for me.

Tests and Iterations
When Cursor finished, I was eager to test the widget. It even helped me put everything into a .zip file and showed me how to install it in WordPress:
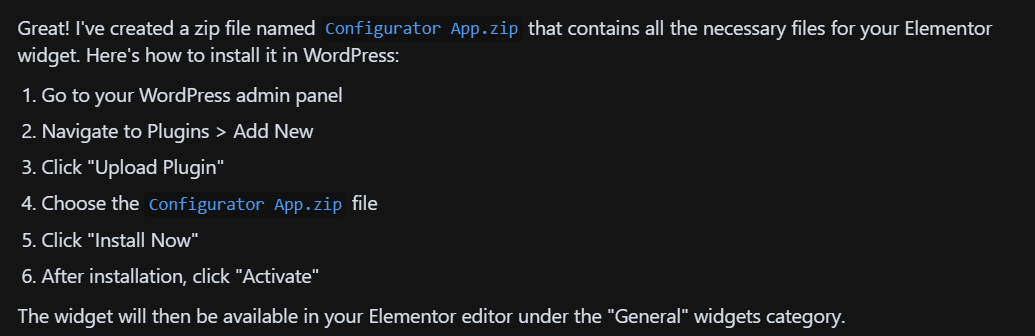
Of course, it didn’t work right away. But it wasn’t due to faulty code. Claude had placed the plugin’s main folder inside another folder. Once I packed the plugin properly, it installed, and most features worked!
I then had some minor problems to address:
Wrong widget category.
Non-responsive widget height.
Redundant buttons in the menu.
These were easy to fix, and I was done soon. But the widget was still not as universal as I wanted.
The Hard Part: Introducing a Complicated Feature Successfully
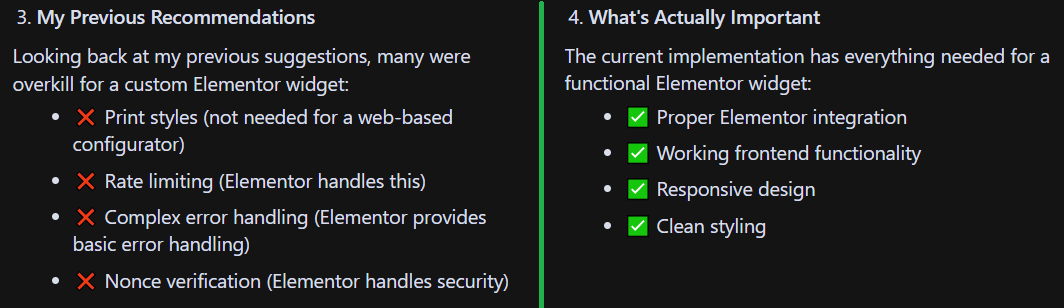
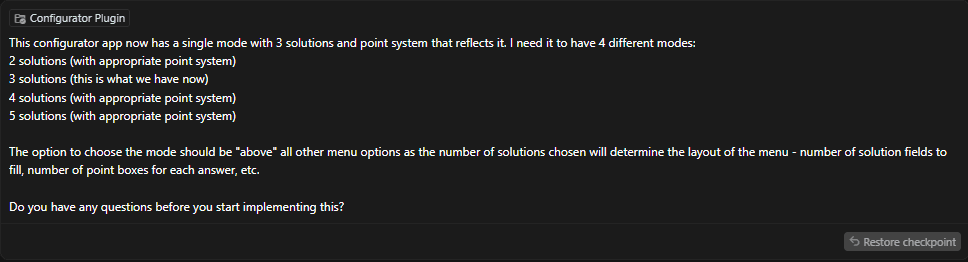
In its current form, the widget supported only 3 possible results. That was too limiting, so I wanted an option to change the number of results freely.
The Elegant Solutions Fail
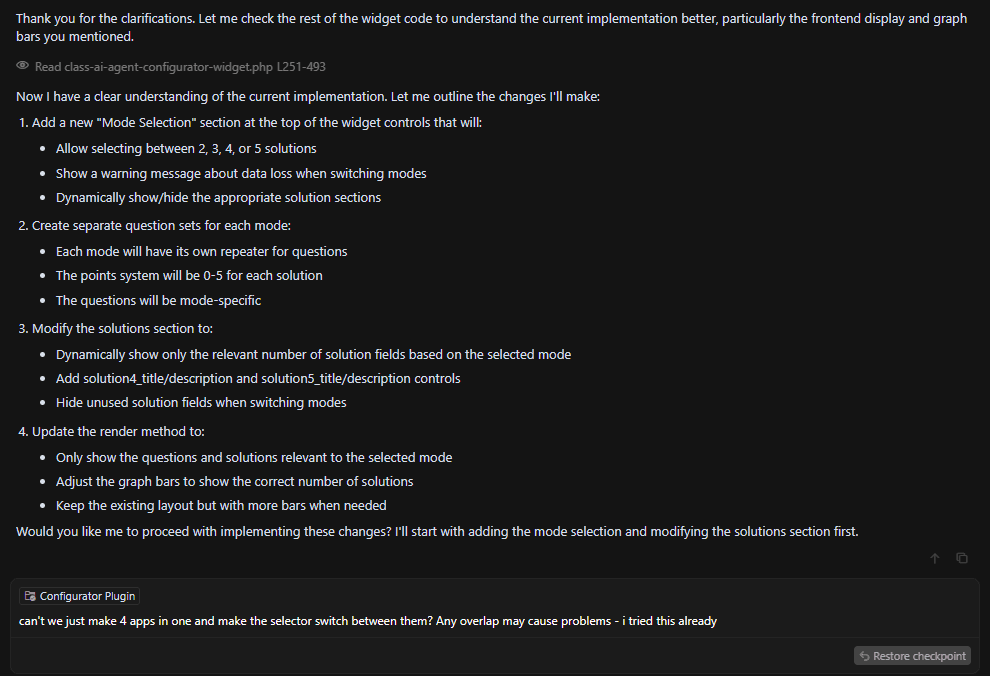
I told Cursor to make my widget more universal. It would require changes across several parts of the project:
There are always 3 solutions. I need the option to change that number. The default should be 2, and I want to be able to add more. Remember to account for other areas of the widget this will affect (punctuation settings, solutions tab, etc.).
Cursor changed the code in multiple places. The back end looked good, but the front end broke. The point system stopped working altogether.
When I showed Cursor the bug, it tried to fix it. But it failed.
Then, a developer friend hinted that the number of solutions must be set before adding questions. This was a crucial insight.
Simple Solutions Work. Most of The Time
I originally wanted a dynamic selection for the number of possible results. It seemed elegant and efficient. But a solution that works is better than one that’s elegant but broken.
So I told the AI to make things as simple as possible. I added some reverse prompting* to boost my chances of success:
*In this context, reverse prompting is a technique that uses AI to proactively ask you for requirements or clarifications. It points out needs you might have missed. Then, it helps you refine your project by guiding you backward from vague ideas to concrete needs.
After I answered the AI’s questions, the plan was ready:
One Last Bump in the Road…
The plan worked and the widget now allowed me to pick from four preset modes. But the graphs for the fourth and fifth solutions wouldn’t work. They just didn’t render properly:
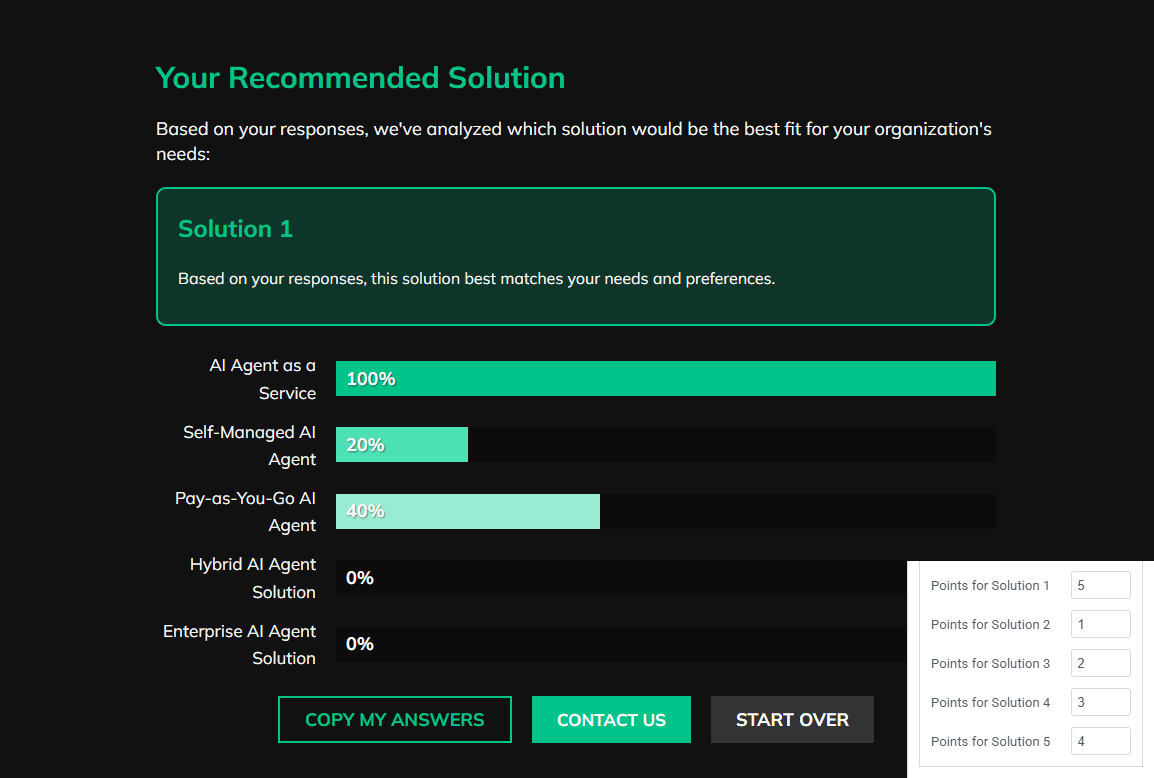
With the current settings, the 4th bar should show 60% and the 5th bar 80%.
Still, I was happy with the progress and asked Cursor to fix it. It tried but failed twice. I then hinted that the script wasn’t adding the 4th or 5th answers in the point calculations.
Overcome by AI Taking the Initiative
After two failed fixes, Cursor decided on its own to introduce a log-collecting feature. It asked me to pass the logs back to it!

I did:
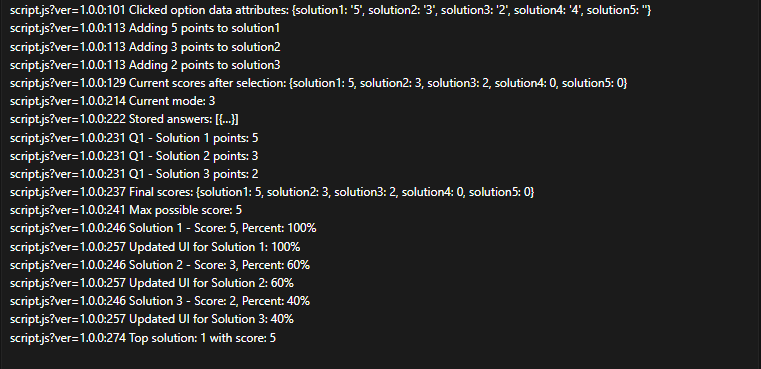
As you can see, it recognized 5 attributes, but the mode said “3.” Once it had the logs, Cursor fixed the issue!
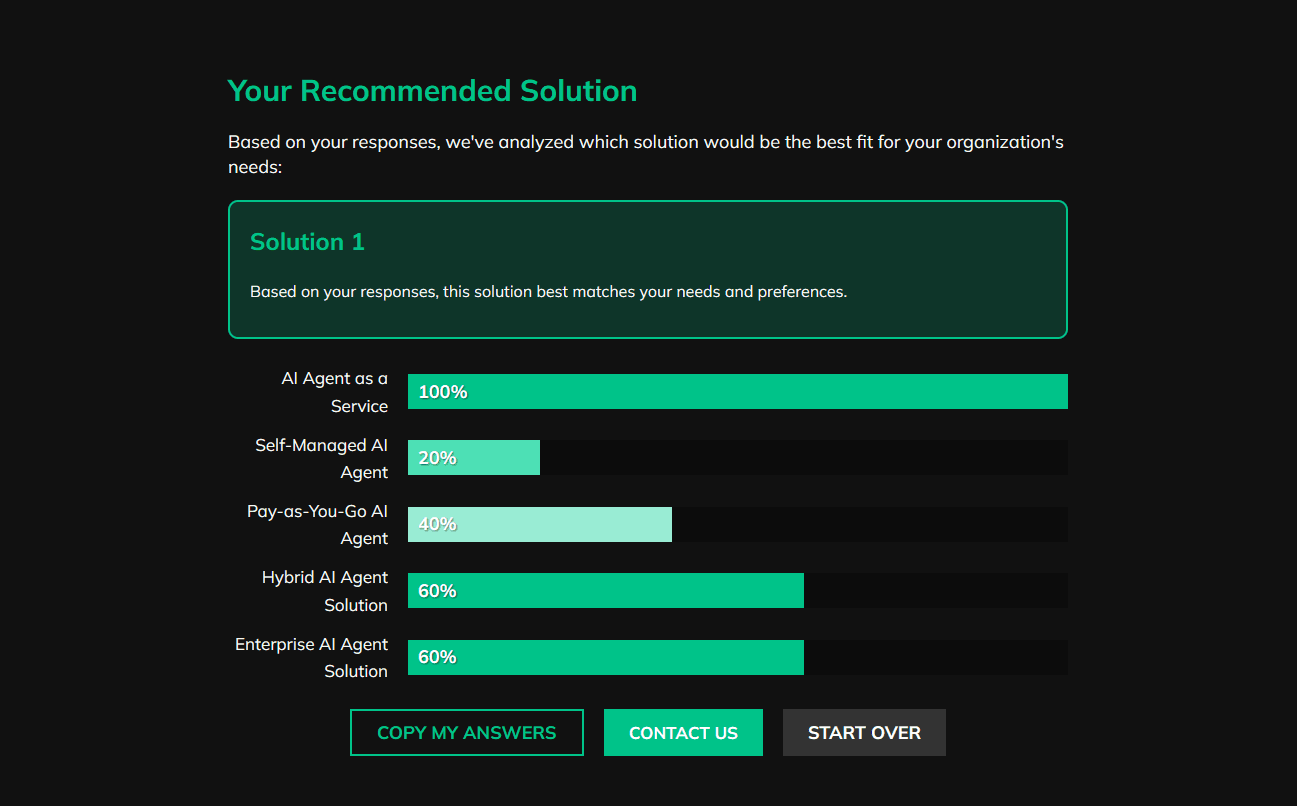
The End Result
No real vibe coding journey is complete without a demo. So, to prove my new Elementor widget is truly flexible, I prepared a short trivia quiz for you. Good luck!
Conclusion
And there you have it: a working software solution built with zero human-written code. Does that mean programmers are becoming obsolete? Of course not. If something breaks, I can’t fix it on my own, and I have no idea how most of the back end works. That makes future development tricky. Programmers still have the deeper expertise. They ensure best practices, maintain complex code bases, and guide projects toward smooth deployments. AI can do a lot, but real-world software still depends on human know-how. So if you decide to turn your vibe coding project into a proper solution, get in touch—we’d be happy to help!
Still, this story isn’t over. I might add a stat-gathering system for A/B testing. We’ll see how it goes.
*You might also want to see what a purgatory my workmate had to go through to automate backlink auditing. But she did it – with vibe-coding + Apps Script + Google Sheet automation.